Wednesday, March 12, 2014

My plan for the rest of the year

So, I've been doing everything else but sewing, and even though I don't want to stress about it, I really want to get better at it. So, I decided to make a plan for this year. Nothing too ambitious, because then when I can't keep up, I end up giving up altogether. So, my goal is to make at least 6 garments this year. I still have like 9 months to go, so I think this is reasonable even if I get some slumps sometimes.

My planned pieces are:

1) Bathrobe
This I've actually started: I have traced most of the pattern pieces. What's great about this project is, that I won't have fitting issues as it doesn't really have to fit. I mean I have to fit inside it, but when I lived at home I used my dad's old bathrobe a lot because it was so nice and soft. So, it really can't be too big... I found a really nice fabric from SelfTissus, unfortunately they only have solid colors now, but here's a picture that used to be on the site. As a pattern I'm using Jalie 2567.
Bathrobe fabric
Jalie 2567
2) Vintage dress
This I've also started, but I got nervous about the fitting part... So, this is actually what I planned for my last year's Monthly Stitch challenge for September. But then things happened and I just didn't have time to finish. I have traced the pattern and even cut and marked the muslin. So, I need to start the fitting process. I have an idea how to do this, Craftsy is really helping me in understanding how it's done. It's so much different to actually see how the fitting is done, than trying to figure it out from a book.

I'm still planning on the same fabric as originally, and I'm doing the short sleeve version. If the final dress fits and otherwise succeeds, I will do a long sleeved version from a petrol blue wool I bought from sale last year (3m/15€, pure wool!).

3) Renfrew
I've been planning to make a renfrew top for a long time. I'm a bit nervous about sewing with knits but I just have to start somewhere. I'm thinking of starting with a short sleeved version in this as well. I have a perfect amanita fabric (I just learned what that red mushroom is in English), although it is more turquoise than in the picture here. If I like how it turns out, then I will make another version (maybe a long sleeved one) from this cutest monkey fabric ever! Second one should be quite easy to make if the first one is good, right?
Monkey fabric for renfrew no 2
Amanita fabric for renfrew no 1


4) Cambie
This is something I need to finish before it's time to defend my thesis. Well, there's still about 1,5 years until that time, but at the rate I'm going, it will com up fast. Well, I might want to use the cambie before that, but I think I can still wear it for my defense. And why is this a perfect dress for that? It's that because of the fabric, which I "designed" and ordered from Spoonflower. So the quote marks are there, because I just basically took this super pretty Hubble image of the Orion bar, and then just chose how it's featured in the fabric. I also ordered some basic black (which is not quite black as the printed fabric will never be quite that, but it will match the picture fabric black) and I will use that for the bodice and then the Orion bar will be on the skirt part. And I chose this particular picture, because this is the area I'm currently researching. I'm kind of excited about this! Yes I know, I'm a geek.
Credit: NASA, C.R. O'Dell and S.K. Wong (Rice University)
5) Swing dress
This is something I actually started way back and got stuck with the fitting... There seems to be a pattern here... (pun not intended). So I just had started swing dancing and lost my heart and then I got the pattern. This was also the time I got interested in sewing again and there was Casey's sew-a-long from where I found the pattern. I traced the patterns cut the muslin and it's been at that stage for couple of years now... I really like the look of it, I have a pretty brown fabric with some print fabric for contrast and I just want to get it done!

6) Tofino pants
Well, it really depends how long can I make my tofino pants, they might be more like shorts: I only have 1 yrd of the fabric. It was all that was left, but hey, it's dinosaurs, so I really had to get it anyway. And I'll make shorts if it's not long enough for pants... If it was normal width I probably could squeeze pants out of it, but the width is just 106 cm. But don't you think it's cute? I can't wait to wear my pyjama bottoms!
Dinosaur fabric for pyjama pants
Well, the actual projects might change, but this is what I'm planning now. And anyway the goal is to finish at least 6 garments, I'm not being too strict about these being the actual 6. In general I'd like to have more blouses, and now I realized there's not a single blouse on my plan... So, that might change. And I can of course make more than 6 if I can. I'm just super slow with my sewing, and I like to try not to cut corners, because then the clothes are more wearable.

I also have some knitting projects and next weekend I'm doing something quite exciting! I will post about it next week, so you will have to live in suspense until then. Oh, and what did I notice on the weekend? The second series of the Sewing Bee is on! And I can watch it on tv as I'm in UK for awhile. How cool is that!

Sunday, March 9, 2014

Slow beginning of 2014...

So, life has been crazy for me. Lot of traveling, both for work and for fun and I've been somewhat sick most of this year. Nothing super serious, but I did break some ribs from coughing... In any case, I haven't really felt the urge to pick up a project. Last year I did do a skirt for my niece/goddaughter for her birthday. It's basically the same circle skirt I did for myself, but it has a elastic band as a waist.
The skirt - ready to be sent
What was actually better than the skirt: yes you guessed it - the bubblewrap...
For myself, I haven't really done anything. And now I'm in UK for a month, so no sewing machine... But I took some knitting with me, we'll see how much I get done. I have a sweater I started long time ago and it's basically just missing one sleeve. I wanted already to finish it, but realized I didn't have all the yarn with me in France. So my mother found the rest and brought them when my parents came to Paris. I have no idea how it ends up fitting, I got the Sweater Surgery class from Craftsy just in case.

I also took yarn for another sweater, which I'm planning a bit better with the help of another Craftsy course: Knit to Flatter (Can you see the addiction here? But I love just watching the courses, even if takes me a long time to actually use the knowledge...). Hopefully I have time to at least start that.

My scarf
The new yarn
Yesterday I went to a local Hobbycraft store in Milton Keynes. I ended up spending £50 for odds and ends. Well, I have this scarf that I love a lot, a friend made it for me. And I saw similar yarn it was made from and decided I'd like another one :) This might wait until I'm back in Paris, though.

I also found something interesting I hadn't seen before and as it wasn't super expensive, I thought I want to try... It's a knitting loom. I like leg warmers a lot and decided to try how it would be like to knit them with a loom... I basically just need basic rib stitch, so it's should be fairly easy. There's a booklet, though so the loom comes with instructions for socks, but it uses the same size heel for all the sizes, which I find a bit strange. But there seems to be a lot of information in the net (what a surprise) about loom knitting, so I should be fine.
Knitting loom and the yarn for legwarmers
So, hopefully I have something finished soon. Sewing will have to wait until I'm back in Paris, but I have some ideas (+ few things I've started). Hope my life will be a bit less crazy for a while...

Wednesday, December 4, 2013

Bit of a break...

So, I had quite a hectic period in my life, so no sewing or blog updating. I was in a conference, where I had a poster, I had to find an apartment, travel back to Finland (for a friend's wedding + work) and then I had to move. So, that pretty much ate up my October. First week of November I still had apartment stuff to deal with and then last week I had my well deserved holiday in Qatar, visiting my cousin who lives there.

Qatar was amazing, and the fabric prices! I could've bought so much... But, during my move I realized how big my stash really is, so I was very strict with myself and only bought 2 meters of this silk (~20 €, can you believe it?). This kind of silk costs like 30 €/m in France...
And then my cousin also showed this crafts store to me, and well, I spent a few euros there as well...
But, I think I was controlling my impulse to buy very well :)

It's back to sewing for me, I have so many plans, but I decided to stay out of sew-alongs and stuff as keep it stress-free. Well sort of, there are a few things I'd love to see finished...

Sunday, September 22, 2013

Fabric for Fashion - The Swatch Book

So, since I haven't been sewing, really, but apartment hunting and guarantor hunting and stressing about it in general, I thought I'd tell you about a book related to sewing I got myself lately. I'm really trying to cut down on actual physical books that I have, and this is not exactly the smallest, but this is something you can't get for kindle.

I've been wanting to get this book, since I first read about it in Tilly's blog (you can also find more pictures there, I'm lazy...). Now I decided I needed to get it. I'm having trouble of understanding all the different fabrics, especially in English (and in French!). And when you're ordering online, you don't really have a chance to feel how the fabric is. And it's not exactly something I'm great in Finnish either. So, I thought this book was just what I needed. And it's amazing! It doesn't go in very deep on the fabrics, just gives you the main idea of what and how the fabrics are made, but it provides swatches!

So, they introduce the main fabric types and the swatches are not dyed, so they're mainly white/grey so that you won't be distracted of the color of the fabric. This really gave me some understanding of the different common fabric types around. And leaves out a lot of guesswork. Also, the book is about 70 pages, so it's not a huge read. The book is more introductory, but I think a huge book with a lot of information wouldn't work with swatches. It already is quite thick and the nature of the information is such that I need to go back to this book over and over again before I've actually learned to recognize the fabrics without the book. But I can recommend this to anyone with the same problem: it really makes a difference to feel the fabrics.

Sunday, September 15, 2013

Bombshell swimsuit --- or I'm always out of season

The Stitchy Details:
Bombshell Swimsuit
  • Challenge Theme: Originally: Swimalong 2013, tried: Défi vintage - Thread and Needles: Plage (Août 2013), but missed both deadlines...
  • Pattern used: Bombshell swimsuit
  • Fabric: Turquoise lycra with red dots and swimsuit lining from Spandex House (love the selection, but the postage was huge!) 
  • Notions: Swimsuit elastic, cups (swim proofed)
  • Did you make any pattern alterations or design changes? I made the size 10 of the view A of the pattern and added some seam allowances to waist and hips, since my measurements were slightly bigger on those parts.
  • First worn/Wear again? For the pictures. It's not really swimsuit weather in Paris anymore... Maybe in Qatar in November if there's a place to swim.
  • Total price: ~75 €, most of this came from the fabric, because the shipping costs were almost the same as the price of the fabric. And also I ended up buying 2 patterns for this...
  • Time to complete: 16h

---------------------------------------------------------------------------------------------------------------
Taping the pattern...
So, remember when I wanted to make a swimsuit in June? Well, I didn't abandon the plan, but I needed to pluck some courage to actually make it. And also, I tried way too many challenges at the same time. I thought I had time, but then, I have other things in my life too. Like work. That really cuts on my sewing time... Anyway, I have finally joined the wonderful group of sewing ladies who have pictures of their butt in the internet. The things sewing makes you do...

I actually had another pattern at first, as you might remember, but when the bombshell suit came along and there was no need for zipper like in the other pattern, I decided to go for it instead. Also, seeing so many awesome examples around, I just couldn't help. But, I didn't make the deadline. I mean, that was end of June and now it's September... I thought I would make it to the Thread and Needles vintage challenge for August with a theme: beach, but hey, I missed that deadline too... But, I finished the suit and finally I have a new swimsuit! That covers my butt and my stomach! I haven't seen bad versions of this swimsuit or unflattering ones either. I think this is one of those garments that look great on everybody!

I was a bit nervous, since I haven't really sewn anything stretchy before. Well I have, but I've always had a serger and now I just have my sewing machine, since the serger is my mother's and lives with her and of course at school I used the school's serger. But the pattern said, you only need a sewing machine and I have been watching a craftsy course about sewing knits without a serger, so I was sure it's doable.

Cutting, first time using weights :)
Well, I had some problems with cutting. I think my mistake was trying to use the rotary cutter. I think the idea of the rotary cutter is a good one, but mine is kind of dull at the moment, so it didn't give me a clean cut. Also, with back I forgot to grade the pattern to my waist and hips, so I had to cut that again... Luckily I have more than enough of fabric. Even with my screw-ups I think I have enough for another swimsuit. Well for a bikini anyways.

I decided to do this one right, although I wasn't really into making a muslin (and I haven't really read anyone making alterations), so that part I skipped. But I decided to hand baste my ruched pieces together since gathering and machine stitching with pins doesn't really sound like something that would work well if I do it... (also I was in the middle of a 2-part episode of Star Trek, TOS, so this way I could keep watching...).

Still a big mess...
I lost my faith so many times doing this... Mostly because I haven't sewn anything with a stretchy fabric before and I was so afraid that everything would turn out horribly wrong. I had some trouble with my added seam allowances. I didn't realize that I put them in the center seam in the back (yes, as it is pointed out in the instructions: the curved seam is the center back!!!). So I had to adjust the leg openings a little. I sometimes found the instructions a bit confusing, but then in the end I was just following the sew-along posts. And those instructions rock!

Bombshell SwimsuitThe hardest part however was the top part. It took forever for me to get those cups in place and I still think I sewed them on too low. Also, I'm wondering if I should've taken the smaller size I was debating about while I bought these. But I think the biggest problem is the shape. Although I'm not against the whole bullet style in general, it is the style favored in the 50s, but these are really hard, while the 50s style would come because the didn't have underwires and the bra's were made of fabric without any shaping material. Also, I distorted the top while I sew the elastic on and it's too big and the elastic is not holding anything. I did fix it a bit with the straps, so I think it looks ok in the pictures, but I'm not really happy with the top part.

Bombshell SwimsuitAll in all, I'm not over the moon about it, but as for it being my first swimsuit it's ok. The pattern is amazing, although I think I didn't need the extra I added for the seams (or I could've stretched the elastic a bit more), I could've gone for a bit more tighter fit, which is what I like when it comes to swimsuits. The style is very flattering, but I think next time I try to find cups that are less pointy and more comfortable. Lauren used a trifted bikini and ripped the cups off that, which might be a solution. But I think for my first swimsuit this is very presentable. And I was a bit worried about taking photos, you know, in my swimsuit, in the backyard parking lot 7:30 pm, when it's 15 degrees outside... The lighting could've been a bit better, but yes, my legs really are quite white. But no one walked by and it wasn't as cold as I thought. And I got my pictures from the first set of 10, so that helps. And see: I'm wearing heels...! I think they were the only suitable footwear with this suit :)

Monday, September 2, 2013

Monthly Stich: September - Vintage Patterns

So, september is here and so is the next Monthly Stitch challenge. This is right up my alley: vintage patterns. I haven' yet sewn one, so I'm quite excited. And as always I'm not taking the easy way out, as my pattern is unprinted one... But I think I can work it out. Let's hope so anyway :)

So, for my pattern, I've chosen one from my stash (yes, I'm starting to have a stash. It's from the 40s (hence, the non-printed situation), Simplicity 3194. I'm still going to trace this pattern, because I want to preserve the original. We'll see how it goes. I also will take a bit more time and measure everything from the pattern to do adjustments to the pattern before making the muslin. Because I really want this dress to fit nicely. That is I'm using my Craftsy course (Fast-Track Fitting by Joi Mahon) technique :) I'm not good with muslins if there are a lot of alterations, and this way I'm hoping that I have only few adjustments to the muslin. I'm thinking of making the short sleeve version, since I think that would be better for dancing. Although I think I'm skipping the rick rack braid this time. I might add some tatted lace, if I have time and energy to tat enough of it.

I'm quite excited about this. I have a fabric, I decided to use my flower fabric, which I bought from Paris about a year ago when I was here for the interview (so not the yellow one, I'm just too lazy to take a new picture of the fabric... But I still need a belt buckle and some contrast fabric: I'm thinking red. Or I might go for solid blue like the background color, or possibly white. Depends on what I find. Finding the right color to go with fabric you already have is not always easy-peasy. All the other notions I should have already. I found a huge amount of snap fasteners, since I tend to buy them and not remember I actually have some at home. Well, at least I'm not in danger of running out...

I'm kind of torn about this project. I'm excited and really nervous at the same time. But I guess I never learn if I don't try...

Saturday, August 31, 2013

Alteration DVD giveaway by Gentleman Jim

The other day I was reading my blog feed and came across this post by Clare at Sew Dixie Lou. So I checked out The Lost Art of Fine Tailoring, a blog I hadn't heard about before and the giveaway Jim is hosting. Firstly, even if you're not interested in the giveaway (which, really, you are if you sew), his blog has already a lot of information on sewing and fitting and such. And he just started it!
And he knows what he's talking about: he's been in the garment industry since 1961. That's quite impressive. He's experience is mostly on men's clothes, but includes women's clothes too (and in any case: I think the same techniques are applicable to either, with maybe slight variations). In the 60s he actually tailored custom clothes for major stars like James Brown, B. B. King, and Duke Ellington among others. Maybe I'll find some swing clothes tips there as well ;) although 60s is not really the swing era anymore. Lately he's been teaching sewing in Georgia.

So, to join the sewing community, Jim is hosting this amazing giveaway. I think I can speak for everyone, that he's most welcome! I'm so excited about this blog and the perspective it offers and of course I really want to win the dvd... :)

Wednesday, August 28, 2013

Sewing Dare no. 1:
My Jazzy Aristocats Circle Skirt

Jazzy circle skirt
My happy picture: too bad you can't see the
 whole skirt and my shoes that I wore just
for the pictures...
The Stitchy Details:
  • Challenge Theme: #sewingdares
  • Pattern used: Self drafted 
  • Fabric: My pretty Aristocats cotton, bought from Etsy and no longer available
  • Notions: Zipper and 2 snap fasteners
  • Did you make any pattern alterations or design changes? No changes, since there was no pattern...
  • First worn/Wear again? Worn today to work. Will wear again for sure. Probably even dancing on the weekend, if I don't feel that the petticoat waist is too bulky.
  • Total price: ~49 €
  • Time to complete: 14h 15min

---------------------------------------------------------------------------------------------------------------
Jazzy circle skirt
Front view without
a petticoat
I decided to go for the Monthly Stitch format for all my finished project entries, although I added the time to make, which is pretty accurate, but I always round up to closest 15 min. I'm a bit anal of doing things in a consistent way... Maybe it's the scientist in me, or the accountant. Who knows. In any case, I thought it was a good one, so I'm stealing it for my blog.

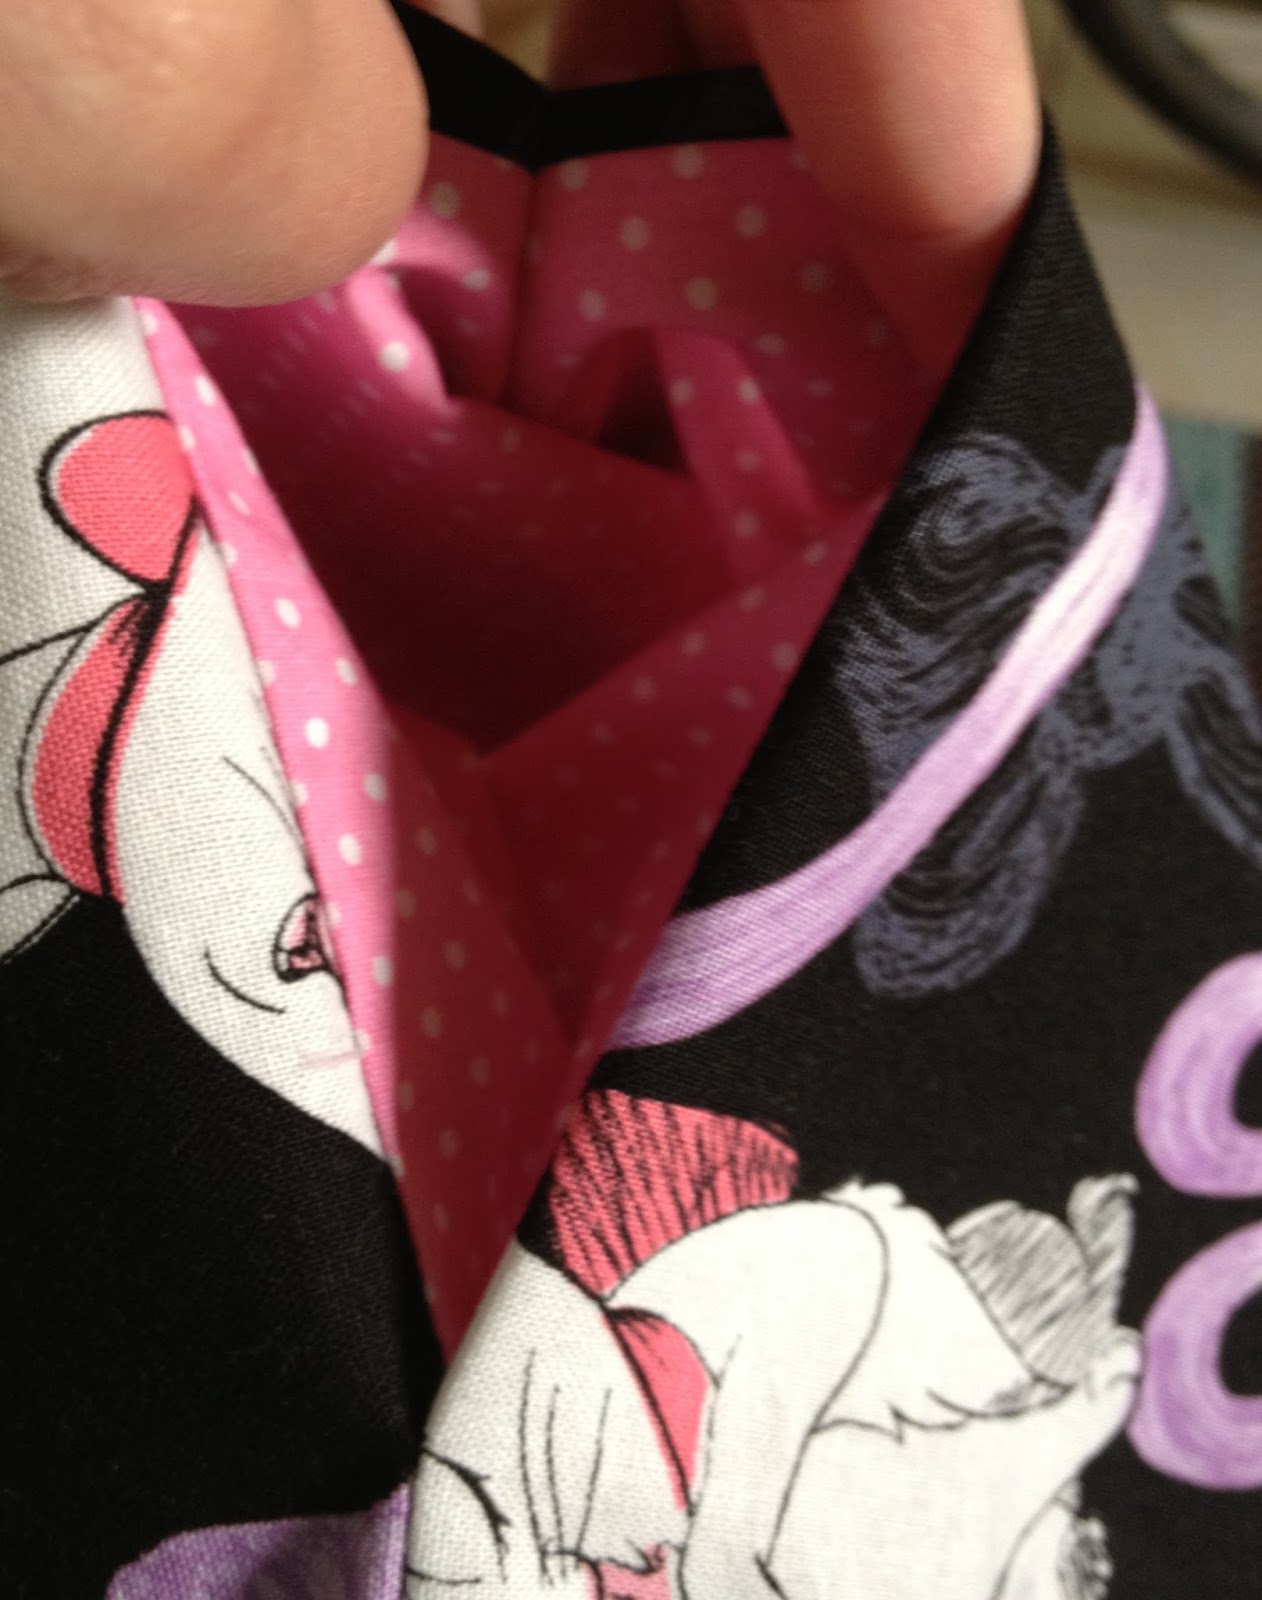
So, I didn't have a pattern this time. I almost said it's my first time without a pattern, but that's not true. I've done self drafting before (from old clothes), like the top here. And I did sew a skirt in high school with the same method and that actually turned out quite well. But I've never done it on my own before. So, without my mother's help, that is. But I'm really getting more confident with my skills. I have a great machine that I pretty much know how to use (I used to have my grandma's old, which brought me to tears every time), and then there's the internet. And I know where my weaknesses lie (read: fitting).

So, I had made all these calculations as I wanted to make as long circle skirt as possible to have the more authentic vintage look. Well, I know Aristocats don't really fit into that as the film was made in the 70s (1970 to be exact: I just had to google...) but in any case. And hey: they liked jazz, I like jazz, I'm making a skirt for dancing to jazz... But I'm going on a tangent here. So, I actually calculated how long it should be and stuff and when I started actually making the skirt I realized that I did these calculations for nothing. Nothing wrong with the calculations themselves, but I didn't think that I have one way design on the fabric, which means I have to cut the both sides the same way and I can't use the sideways cutting...

Pockets - what a happy idea!
But after that it was pretty much a breeze. I wanted to have pockets, like I always do, but I just used the same pattern piece I drafted for my Réglisse. I even used the same fabric as in Réglisse, the one that was left over from Pastille that never came to be... I also am not a fan of an elastic waist. So, that meant a zipper and a waistband (waistband being the reason it has taken so long for me to get to this: I wanted solid black fabric for it). I found great help for this as I was wondering how to put the zipper in as I didn't want to add a pocket AND a zipper to the same seam. But Casey over at Elegant Musings has a series of circle skirt tutorials (it was a sew-along). I used her method to add a slashed zipper and also the instructions on the waistband. Well I did make some mistakes in the waistband originally, so I ended up cutting a new one. Luckily I had a bunch of the black fabric: it was super wide, from the home decoration side of the fabric shop and you had to buy at least 50cm. Well, there's a lot of it...

The hem finish
Only thing that really took time was hand stitching the hem. But I think it was worth it. I was a bit annoyed how that turned out on my Réglisse and I really wanted this to look good and not go wonky. And I think I achieved that, you can judge from the picture. I also used the bias I had left from Réglisse, so I could have a longer hem. I don't know about the hem calculations, but this ended up being almost as long as I originally wanted (maybe it's my waistband that lowers the hem). But I would've been finished a day earlier if I had stitched it with the machine (it took me like 4h to do the whole hem...). But as I said, in the end, I think it's worth it. And when it was all finished, I realized I had a problem with the waistband, so I changed it back to the original that I had already discarded and actually that one worked really well :) I actually wanted to put in a skirt hook instead of the snaps for fasteners, but I realized that the ones they sold me were for pants and they were huge. So, not really great for my kind of flimsy waistband. And the other hooks I have were too small. But luckily I have a lot of snaps... I always buy them thinking I don't have any, but I have a lot, even some black ones.

So, my pictures today didn't turn out so great, but at least you can see the skirt. In the side view pictures you can really see the difference when wearing a petticoat or not. I have one with a bit of tulle, my mom made it for me for a 50s skirt when I was in high school. It's a cheap version, but actually quite accurate for what was worn at the time (my mom still remembers).
Jazzy circle skirt
Side view without a petticoat
Jazzy circle skirt
Side view with a petticoat
Thanks Clare for challenging me to do this! And of course Gillian to arrange everything in the first place! It was fun and I'm really happy about my new skirt! Here's some compulsory swirly pictures where it's really advantageous to have a petticoat!

Jazzy circle skirtJazzy circle skirt
Jazzy circle skirt

And on the giveaway news: I never reached the Colette Sewing Book winner, so I chose a new winner:
I will mail all the prizes this week. I hope you enjoy them!

Thursday, August 22, 2013

The Cape of Misfortunes

The Stitchy Details: 
  • Challenge Theme: The Cape Challenge - August 2013
  • Pattern used: Milano Cape by Papercut Patterns
    Contemporary, sizing: XXS-L (my size: S)
    Description by Papercut Patterns: Double breasted cape with six buttons, a flat Peter Pan collar, side single welt pockets and full facings.
  • Fabric: Wool, bought locally
  • Notions: 6 buttons
  • Did you make any pattern alterations or design changes?
    No changes, except the use of different fabric for the pockets (but this isn't really a change). Unless you of course count the fact that I sew one of the welts upside down.
  • First worn/Wear again?
    First worn for the pictures, this is definitely for the fall/winter. But when the cold weather comes, this will be part of my wardrobe.
  • Total price: ~36 € + pattern ~22 € = Total ~58 € (The buttons & thread is an estimation: here in France I tend to only get the bank card receipt with the total amount, so no idea what they actually cost. I estimated the cost based on internet stores).
  • Time to complete: 14h 30 min

---------------------------------------------------------------------------------------------------------------
Well, the first problem came with the welt pockets: I had totally decided to use the furniture cotton for the pockets. But when I started cutting, I noticed that the knit actually matches the color a lot better than the furniture cotton. So I decided to use the knit after all, since that was the exact right color. But I thought the pockets wouldn't be sturdy enough with the knit, after all, this is outdoor wear for winter. So, what I did was I used the knit for the welt part that shows outside and the furniture cotton for the actual pocket.

The second problem came with cutting: I noticed that I didn't have enough of fusible interfacing. I bought according to the pattern (and even a bit more, since it said 1.3m and I got 1.5), but what I didn't notice was that my fabric wasn't 140 cm wide, but 90 cm... So, some creative solutions: since this wasn't the type you need to iron on, but sew, I decided that it doesn't matter which one is the right side, since they won't show anyway. So, I cut the hem interfacing both the same way. And for the undercollar, there will be a seam in the middle. Since I totally had enough fabric, just not enough for continuous pieces.

And then: the thing I was dreading for: matching the fabric. I was going to use Tasia's method in matching plaids, but my problem (third and I haven't even cut the fabric yet) was, that I couldn't fold the fabric in half as I normally do, since the cape pieces were too big, and I couldn't do it the way it was done in the instructions (you fold the fabric the other way, so that selvedges were on the sides of the fold), because my plaids weren't symmetrical. At this point, I started to wonder if I have enough fabric to match the seams and I decided to try to match the main pieces and then match the collar and facings if possible. Well, in the end, matching wasn't that bad. I matched everything except the hem facings. But I my pieces were a bit stretched out in the process...

But: the plaid matching seemed to work pretty well, as you can see from the picture below :) Well not for the facings, but I was getting tired by then and they don't really matter as they don't show. Also, the only piece that was stretched out was one of the front pieces, so I sewed the buttons on that one, so that it was left under the other piece. And you can barely notice it.
The back seam: it's not pressed and still you can hardly see where the seam is!
The cutting actually took like 6 and a half hours... Don't do a plaid cape... But as everyone who has ever known me, might already know: I never take the easy way out. At some point I realized that the fusing actually was one with glue, just not a whole lot of it... But this really didn't become a problem. Although I might've used the iron a bit longer and not having to sew it to all the pieces.

And then, the first actual sewing thing. The thing I was dreading: the welt pockets. After the youtube tutorial I was quite confident about the sewing of it all, but I really hadn't internalized which way you place the welt, so that it will come out the right way in the end. I even searched the internet before sewing it! But the one that I found where they actually used a garment and not just pieces of fabric for show, was one where they did a bit different kind of welt. So, my first ever welt, even though it wasn't half bad, was upside down... The pocket is sewn the right way, so it just has the welt on the upper part, which is a bit funny, but I think these pockets are mostly decorative anyway, and the other one I did the right way. And I think I really learned it now...
My first ever welt!
Here you can see the problem: on the left the correct welt and on the right not...
I also realized I'm gonna run out of thread, so I had to use red that wasn't really matching the fabric with the facings, but it's inside and doesn't show. And once I had pinned all the facings, I realized my pins were the wrong way around, so I get sticking myself with them the whole time I was attaching the facings...

So, most of the things that could go wrong with this cape - did go wrong.

But I also learned a lot. Besides the welt pockets and plaid matching, I also needed to relearn how to sew buttonholes. The actual technique wasn't so much of a problem as much as how to get my machine to do what I want... But I finally got it and they turned out fine. I even had enough thread :)  Well, barely, and I had to use another not quite the same color for the bobbin for the buttonholes, but it doesn't show!

And I learned more about my machine: how to sew the buttonholes, obviously, how to actually read the quick reference chart, and that the pressure of the pressure foot is something you should pay attention to when sewing fabrics that stretch easily out of shape. I used pressure 0 and it was perfect for this fabric. Comparing to what I learned in school, I'm really learning a lot about my machine and how to use it better and it's starting show in the things I do. It's somehow easier to make better looking things when you know how to use the tools you have.

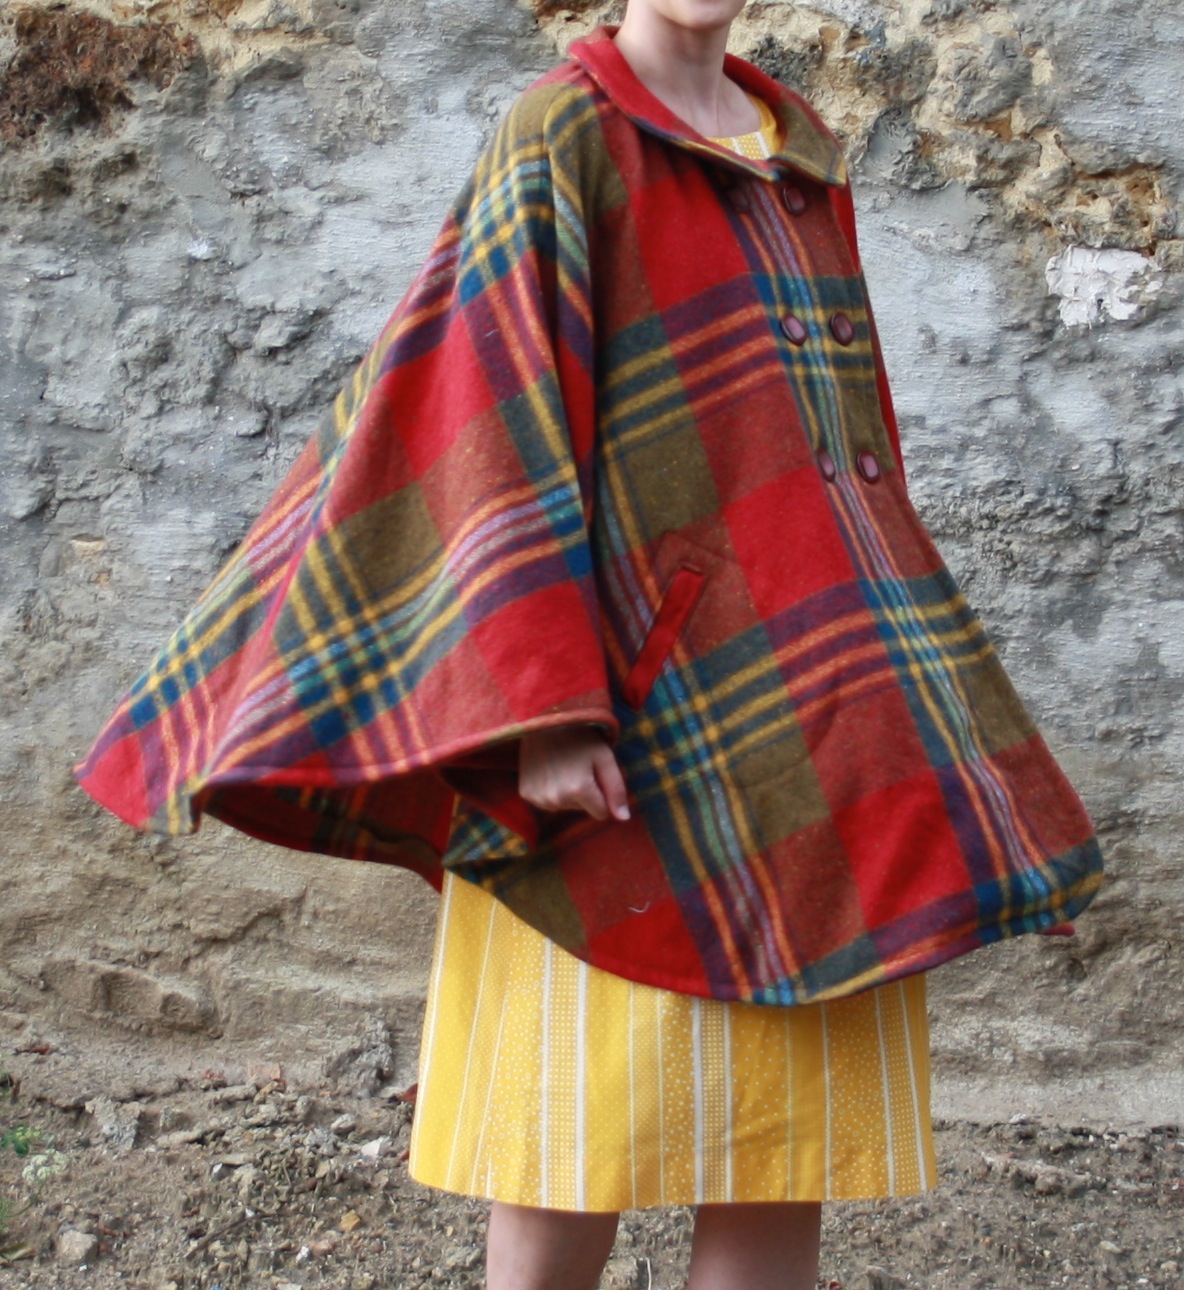
So, finally here are some pictures of the finished cape:

More plaid matching, and here the pockets
look like they are as they should...


I really like the way it flows when you turn :) The fabric is a bit uncomfortable for wear against the bare skin, but that was just for now, when it's too hot for this anyway. But if I ever make another one from a similar fabric (or any kind of cape/jacket), I will definitely line it. I was a bit worried first that I'll look like I was swallowed by a tent, but in the end, I don't think it looks too bad.

I think this is definitely a wearable cape for the winter in Paris! Which is a lot less damp/rainy than the Finnish one and thus more suitable to a wool cape.  And one more thing: This is like the first challenge that I managed to finish on time! Yey for me!

End with a powershot (although it could be more dynamic, but hey, the cape looks good when walking!)
Edit: Check out also my Monthly Stich post!