Wednesday, July 27, 2016

Carnival in Köln

My blog (and my sewing) has been neglected for awhile. This, because last year I finished and defended my thesis and moved to another country. Again. This post has been due for a long time, but better late than never... right?

Now, in Köln (I know it's Cologne in English, but I prefer the original name), they have this thing called carnival. And of course I got very excited about all the dress options...

My first plan was to dress up as Elsa from Frozen. I had pretty much everything except the fabric. Then, I realized at some point that the dress is too complicated for me to do in a short time and also I still had  A LOT to do in my apartment after the move. Which really was the issue here. Because no sewing happened before there was enough space. And the desk that I've used for sewing and have assembled many times, did not want to cooperate this time, so, yeah, delays.

This picture doesn't show much armpit curve.
Anyways, the sewing. So, as I was running out of time and also was told that the dress might be ruined in a carnival setting, I decided to opt for a simple solution: Princess Leia's robe in the first movie. I found instructions (for the pattern and the assembly) in the internet that were simple and yet had the effect I wanted. I also found cheap fabric, which I was a bit worried about, since it was quite slippery, but I really didn't want to spend that much money on this. And since the way the dress was done, it required quite a lot of fabric (8m), I was happy I found it at 2,95 €/m. It was kind of shiny polyester, so it's not super accurate, but ok, because carnival. I also decided to omit the belt and use something I already have, because time & money.

Well, I made a first version and lost faith. Somehow this wasn't working for me. So, I fiddled with the muslin and I was sort of ok with the version that I ended up with. I just basically straightened the curve in the armpit. I decided to make a collar from scratch. I found a blog post where they illustrated very clearly how to do this. I also realized (luckily before I actually cut anything) that there is a problem with the neckline in the instructions I was following: it was the same in the front and back. So, I decided to fix this as well. And I decided to cut & sew the dress first and then worry about the collar and hood.

In the end the pattern worked pretty well. The dress was fairly heavy and it was good my belt was quite hefty. The design was really simple and I was happy with in the end, but the cheap fabric ended up biting me in the behind... For some reason the needle didn't always go through it properly and also I was sewing and noticed the thread isn't really attached... I guess I would've needed a bigger needle, but of course since I was sewing this the last night before carnival I couldn't go buy one and I didn't have any at home... But the slipperyness (this is probably not a word...) turned out not to be a problem. It did end up pulling at the seams though, which was made slightly less by vigorous ironing... NEVER EVER GO FOR THE CHEAP FABRIC!!!

I actually don't have super good pictures of the costume, cause I forgot to take some. Well, I was busy getting ready and then tired... That's carnival for you. But overall it was a good costume. I added black boots and filled my hair with pantyhose to get a fuller look (yes, I know it still looks ridiculously small...). A wig might've been nice, but I didn't want to wear one for the carnival, I thought my own hair was more comfortable. I would say, this was an ok go for my first ever costume, but next time, I will choose better fabric and also hopefully have more time. But the end quality was ok enough for carnival. I tried to crop people out of the pictures so that no one will get there photo to the internet who doesn't want that to happen...


------------------------------------------------------------------------------------------------------

The Stitchy Details:

  • Challenge Theme: No challenge, carnival
  • Pattern used: Drawn by me with the help of instructions
  • Fabric: Cheap white polyester
  • Notions: -
  • Did you make any pattern alterations or design changes? Yes, well, since I basically drew the pattern myself...
  • Total price: 28,55 €
  • Time to complete: Didn't actually keep tabs on this, so I have no accurate guess.... something like 15-20h... I know I sew the last night until 5am...


Sunday, June 28, 2015

A long time a go in a far away galaxy... or a jeans jacket refashion

The Stitchy Details:

  • Challenge Theme: My own: Learn to refashion project
  • Pattern used: No pattern, doesn't really involve that part of the process
  • Fabric: Old jeans jacket + sweater
  • Notions: Thread for sewing
  • Did you make any pattern alterations or design changes? No changes, since no pattern
  • Total price: 0 € as everything is old and already used (I guess the thread would cost like 0,10 €)
  • Time to complete: <3h

------------------------------------------------------------------------------------------------------

So, I started this here. Or the idea was already born years before that, but let's say it started there. 2012 is a nice year to have started this project, right :) The actual time to finish the project wasn't so long, but I did have this on my UFO pile for a long time... Basically what I did, was I cut the sleeves off the jeans jacket and sweater. And I attached the sleeves of the sweater to the jacket.

I think I maybe sewed the sleeves too close to the seam (of the sleeve part), since they are a bit baggy in the upper part of the arm. But since I did all the sewing by hand, I'm not gonna fix it... It doesn't look too bad, right? The sweater used to be one my favorites and I really liked the jacket and the ironed on cat, so I'm happy to get to use both of them again (although I think I need to wait for the fall, as it's like 30 degrees outside now...). The pictures are not the best ever, but the best I can do in this heat...


Saturday, June 20, 2015

Jane Austen tour!


The Stitchy Details:


  • Challenge Theme: No challenge
  • Pattern used:  Julia by Timely Tresses
  • Fabric: Yellow + ecru satin/purple + white satin
  • Notions: ecru/white ribbon + flowers
  • Did you make any pattern alterations or design changes? made the circumference smaller for me
  • Total price: Not listing, since it's a present :)
  • Time to complete: 27h 30min (lots of hand sewing, the time is for the two hats, though)

------------------------------------------------------------------------------------------------------
So, my friend's birthday was coming up. We share a common Jane Austen obsession, so in the end it wasn't difficult for me to think of a present. But I'm not good at sewing with deadlines. So, I started early. I had the pattern: Julia from Timely Tresses.

I'm so late with the post, though, since my friend's birthday was in March already, that I don't have much to say about the process. Except it got a bit tight in the end anyway... But the hats were great, although I think I should've used cotton as lining, because mine at least stretched a bit while wearing... But, it's still ok. And I managed to sew us reticules too that matched the hats, so all was well.

I conclude this with few pictures from our Jane Austen tour to Bath and Lyme Regis:

Bath: Theatre Royal
Bath: Sydney Gardens
And suddenly this happened!
Lyme Regis: Poor Louisa Musgrove wanted to jump from the stairs (see: Persuasion)

Lyme Regis: Miss Anne Elliot at the beach


Sunday, November 30, 2014

Game Night dress

The Stitchy Details:

  • Challenge Theme: No challenge, Game Night party in Herräng
  • Pattern used: La Sylphide by Papercut Patterns
  • Fabric: Shiny sateen with playing card suit images + red sateen
  • Notions: Self-covered buttons
  • Did you make any pattern alterations or design changes? No
  • Total price: ~37 €
  • Time to complete: ~15 h (very much an estimate, as I was in a hurry and didn't really make statistics on the time...)

------------------------------------------------------------------------------------------------------

So, this dress... I had this idea for the dress for the Game Night party at Herräng Dance Camp. And of course I started too late. As always. As you can see from the picture, I actually did wear it to the party (I didn't have anything else, mind), but I'm very skeptical that I will ever wear it again.

First, I was in a hurry and I did a muslin,  but I didn't really had time to alter anything and it wasn't half bad... Then, the sleeves. I really should've made them longer. With this fabric and my arms they just look weird. Also, the red, although a good idea, with this pattern, the whole dress just reminds me of a robe that Hugh Hefner might've worn. All in all I really didn't spend enough time with this. The rolled hem is in not really up to closer inspection either.

The buttons did turn out pretty well, and I will definitely use those again for other dresses. But also, it's good there is no zoom to the buttons as they are not straight in line... I'm also wondering about the whole pattern. I really liked what others have done with it, but maybe it's just not the pattern for me. Although I might try with shorter sleeves and omitting the bow. The fabric was cheap, however, and the scraps are usable for my lingerie projects.

We'll see, I wasn't really over the moon about this. Which is sad as I've looked at the Papercut designs and I love them. I might try this as a shirt version like Lauren did. I might try to fit this better too. I have a similar body shape to Lauren's and she has made the top part a lot more fitting than what's in the original pattern. That might work for me too. I won't throw the pattern away yet, but it might take awhile for me to return to it. And I will need to improve my alteration skills. Maybe this would be a good project for that :)

The party was fun, however, so it was not a total loss. Notice also the matching shoe laces. And I have improved in my hair skills as well since then (also longer hair helps). This was awhile ago, as the party was in the beginning of August. Such is life for a PhD student. I hope to have a bit more time to sew, but I'm not really stressing about it :)

Friday, July 11, 2014

Orion Bar dress

The Stitchy Details:

  • Challenge Theme: Monthly Stitch - June 2014
  • Pattern used: Sewaholic Cambie
  • Fabric: Black and Orion Bar fabric ordered from Spoonflower + salmon colored bemberg lining
  • Notions: zipper
  • Did you make any pattern alterations or design changes? I used a size 8 but the shoulders and darts from size 6. Also I took out ~10 cm of the length. And straightened the neckline with Tasia's instructions.
  • Total price: ~106 € (Spoonflower fabric is fairly expensive, especially with postage to Europe...)
  • Time to complete: ~22h

---------------------------------------------------------------------------------------------------------------
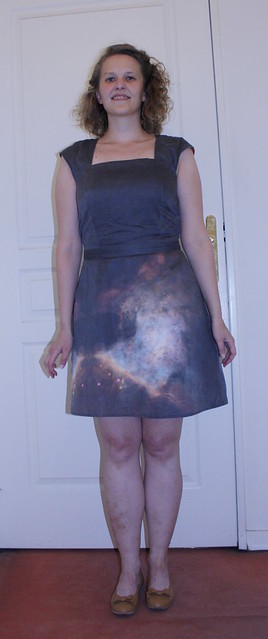
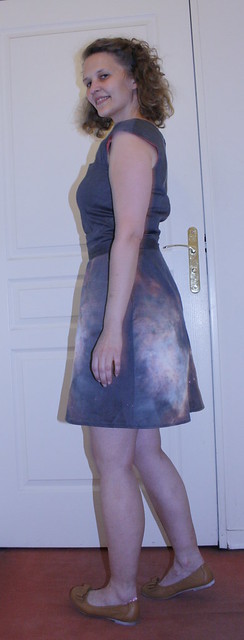
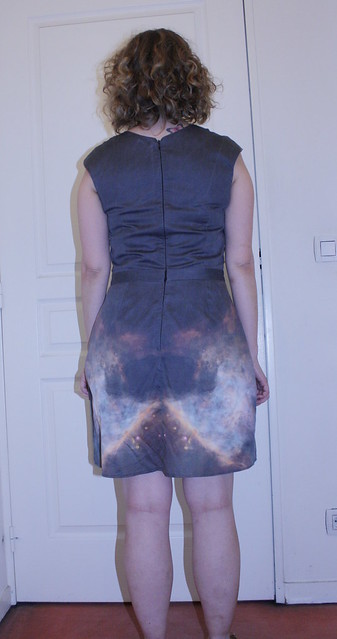
Orion Bar dress - goofing Well, I'm a bit late, since it's July, but I actually finished this in June (30th, to be exact!), but I didn't have time to take photos or blog it as I had a presentation on July 1st. And I actually was finishing the dress for the presentation. The Cambie has been on my list of to-sew for a long time now. There are really awesome ones in the internet and I've been very inspired by many (few examples: Les Mademoiselles: love the piping! Scruffy Badger: the edges on the blue one, so cute! Young Seamstress: just plain lovely, Sewing in the Rain: so classy and I just love the color...)

Actually it was the blogpost of Sewing in the Rain, that gave me good advice when choosing the size. She said that she should have chosen the size according to her full bust instead of the actual bust. I did that now, I actually would be pretty much size 8 (except way shorter) according to the sizing chart. But my problem is that I have super narrow shoulders (as in my upper body is kind of small, and then there are the boobs, if that makes sense...).  So I chose size 6 for the neckline and shoulders and this was the best choice ever! The shoulders fit perfectly and then I just draw to the waist for size 8. I didn't do an FBA (I actually have never done this and I was glad I didn't have to learn it now, as my schedule was kind of tight), I just added a bit to the side seams, but I didn't need much to fit. But there are some problems with the fit. Actually I think I should've done the FBA: there's some wrinkling under the bust, but the front doesn't look too bad. The back, however, is too big as you can see from the back and side photos. So I think the added length did a lot for the bust, but as I added it to the back as well... not so good. So, fitting will require some work next time. Because there will be a next time for this dress :) Maybe with a fuller skirt... Or maybe I'll make this same one, but better.

Orion Bar dress - front Orion Bar dress - side Orion Bar dress - back
I had a bit of trouble attaching the lining. There is a pretty good tutorial on the Sewaholic blog, but still had some problems... I wasn't sure when to sew the lining under the zipper, so in the end I did it before attaching the lining. Now then, I was reading the comments on the post and someone was asking about trimming the seam allowance from the center back of the lining and it was advised to trim it off completely. I didn't trim it off completely, but I still run into problems, and actually with the method Tasia is using, you really don't need to trim the seam allowance at all for the lining before attaching it.

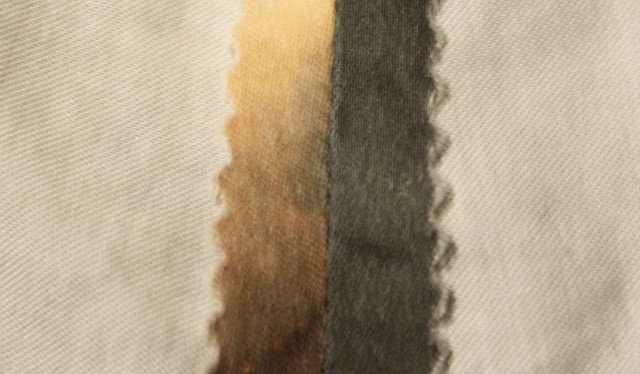
Orion Bar dress - seam finish
Finished seams :)
I got a bit carried away with this dress as this was the first time I used my pinking shears and I loved it as a way to finish the seams. Especially since most of the seams are not exposed anyway, but under the lining, they don't need a whole lot of finishing, but I feel uncomfortable of leaving them totally unfinished. I'm in love! I also used the glue pen to attach the zipper for sewing and it worked pretty well. Lot less hassle than pins. I might really adopt this method in the future as well (this was Stuart Hillard's advice in the Birmingham craft fair).

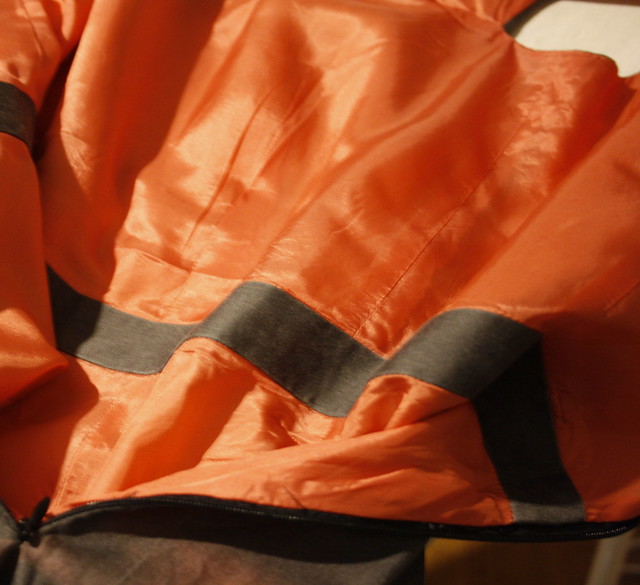
Orion Bar dress - lining All in all I think the result was successful. I love the salmon colored lining (not looking like the right color, I'm still photography-challenged), and the dress was a big hit at our Journée des Thésards (PhD student day), where we were supposed to dress up as our research subjects... Yes, the picture in the fabric is of the Hubble image of the Orion Bar (photo credit: NASA, C.R. O'Dell and S.K.Wong (Rice University)), which is what I study at the moment :)

Wednesday, July 2, 2014

Back into sewing: Tractor shirt for my nephew

Just a quick update about something I did for someone else for a change, as I haven't been sewing a whole lot. I bought this fabric from the craft fair in Birmingham, if you remember. When I saw it, I knew my nephew would love it, due to his love of tractors.
I used the Maxwell Top pattern. The sizing was a bit weird. Well, I knew my nephew is skinny, so I did ask my sister to measure him. When the chest size corresponded to a size for a 3-year-old, I asked her to measure the length too... So, I took the 3-year-old size, but the length of a 7-year-old...

So, when I visited my sister in the beginning of June, I had a shirt. I didn't have buttons so I used snaps, and sewed them on the last day of the visit... The boy tried the shirt on for the fit, but was too fast (it was a hot day and he wanted to go play in the water outside), so I only have a blurred picture of him in it (hadn't adjusted the settings of my camera to inside...). But I do have a picture of the shirt that turned out well.
Stay tuned for a new dress update! It's coming soon, I just need some photos...

Saturday, April 19, 2014

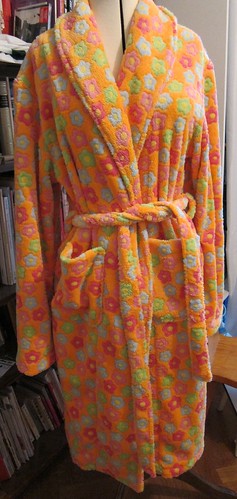
My first new bathrobe in ~25 years!


The frontThe Stitchy Details:

  • Challenge Theme: HabitRPG - UFO challenge
  • Pattern used: Jalie 2567
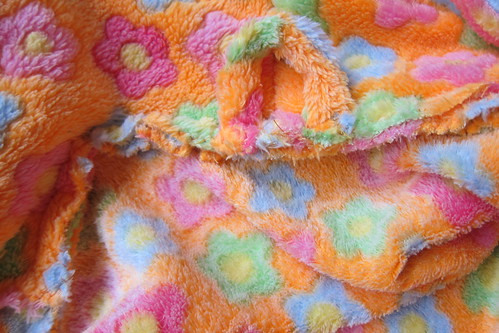
  • Fabric: Velour éponge
  • Notions: -
  • Did you make any pattern alterations or design changes? Added a loop for hanging 
  • Total price: 60 €
  • Time to complete: 13h

-------------------------------------------------------------------

I really wanted/needed a new bathrobe. I gave my old one away when I moved, because I wanted to have extra incentive for making a new one. The old one was really old. My mom bought it for me when I was a kid, so in the end of 80s... It was ok, but started to be not so comfortable as it was quite stiff from all the washing over the years.

I decided to do this for a challenge as well. In April, I joined the site called HabitRPG. This has improved my efficiency so much! I can make my life a game and all the annoying tasks give me rewards :) And I of course joined a sewing guild. And the April challenge is a UFO challenge. Which this one qualifies as I had started to trace the pattern...

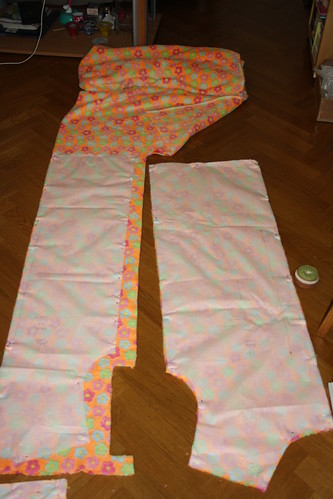
CuttingThis was an easy project to get back into sewing. With all the stuff with the move and traveling for work, I haven't had much time to sew and starting with something I need to really fit, was daunting. This was great as it doesn't really need to fit, just be big enough.

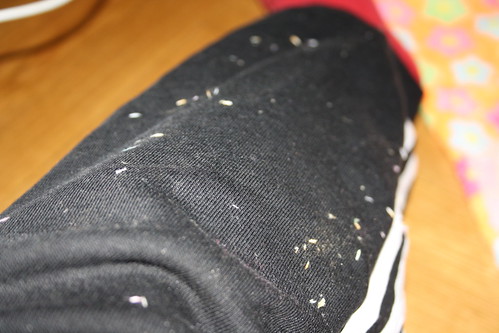
My leg
The fluff was everywhere
Well, I started cutting the fabric and suddenly me and my whole room was covered in little fluff... The fabric is something called velour éponge, I have no idea what that is in English (or in Finnish), but it was pretty much the perfect bathrobe fabric.

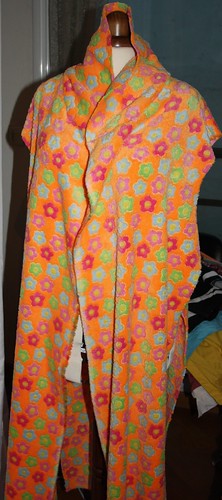
2014-04-12 20.39.12Well, I didn't let that bother me too much and once I actually started sewing this was less of a problem. This was the first time I actually really used my dress form! Who I named Jane, by the way (because that was the first name that came up when I thought about this and hey: Jane Austen). I didn't really need a lot of fitting, but it was reassuring to measure things against the form and pin stuff in place.

Added loop for hangingThere are little details that I could've done better, but I think the skills only come with time and practice. I added a little loop in the middle inside, so that I can hang my robe in the bathroom. The sleeves are a bit long, but I did notice this in the construction stage and decided to keep them long, as if it's cold I can pull my hands inside. so that is intentional. All in all, I think this turned out very wearable.
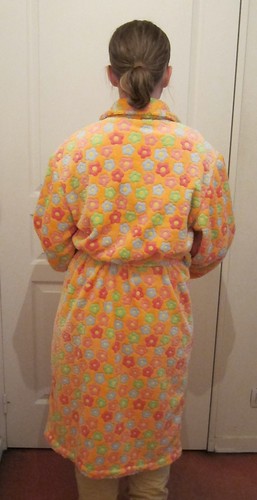
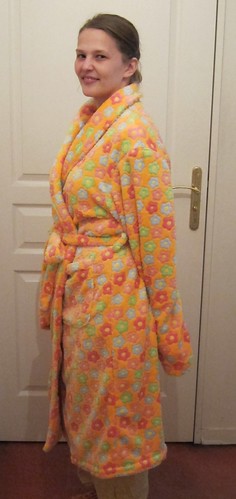
Jane in bathrobeThe backThe side

Friday, March 28, 2014

I made shoes!

Since I saw Tilly's post about making her own shoes, I've been wanting to try it too. Of course I Can Make Shoes, where Tilly took her course, is in London.  Now, finally I was in England for work and decided I would spend some money on this, as I have small feet (EUR: 34, UK: 2) and it makes it hard for me to find shoes that fit and are the style I want. The only course that would fit my schedule was of course none of the cheaper ones, but the one for 3 days: Start your future in footwear, which came with a price tag of £500 (see this and other courses at the website). But I decided it was worth it. Even if turned out to be something I wasn't interested in, I thought I would at least have the experience.

Before I signed up, I wanted to know if I could make mid-heel shoes instead of the high-heeled ones, as I normally wear children's shoes that have no heels at all, and I don't think I would actually wear the high-heeled ones. Amanda got back to me super quick and told me, it's possible, but if I want to make sure there is a correct last for my size, I should buy one, but I could order it and receive it when I came to the course, so that the shipping costs were less. I thought this was a great idea, since I was already getting excited about making my own shoes, and to make them you would need a last of your own. It of course got the price up with £100.

Well, finally the long-awaited day arrived. I was staying in London with a friend and I had looked which bus I should take to the train and then which train to take further. Well, I did take the right bus, but to the wrong direction. In the end I was only about 15-20 min late and hadn't missed much, so it was ok, but I was really annoyed at myself...
The day started with Amanda telling us about the shoemaking process and she had taped our lasts already with masking tape, so that we could start designing right away. I was a bit worried as I'm not particularly good at drawing, but doing it to the last in 3D wasn't too bad. And of course Amanda was there to help :) I chose lovely bright red suede for my fabric and I really wanted to get the mary jane style, as they for some reason don't ever have them in my size - well, with heel anyway.

Filling the bottom with cork filler
After drawing the pattern, we cut it and after adding some allowances cut the fabric. Mine was quite thin, so I also needed interfacing. And of course you need lining as well. The whole shoe making process seemed not too intimidating when you have help all the way. I'm sure you can also learn at home (they sell kits and instructions on the website as well), but I would really recommend taking a course. Even though I had someone explaining what to do, I messed up and Amanda ended up fixing things. I'm sure that by myself I would've had been lot more frustrated. No, there was no frustration at all and after the first day I had almost finished the upper (which is the top part of the shoe), and I had my insoles covered as well.

Second and third day went by as fast as the first one. Lizzie joined Amanda as a teacher and it was even less waiting around. We were also quite lucky as there was only 4 of us, when the maximum size of the group is 6. We had a great group, 2 Brits, 1 Egyptian and 1 Finn from France. We all bonded over lunch and shoe-making. I loved to see everyone's shoes taking shape and they were all fairly different to each of our tastes. And I loved all of them, even if I think I would only wear mine.
See more pictures at the gallery of I Can Make Shoes
The shoe making process involved a lot of gluing, some stitching, and then some drilling and hammering... I definitely learned some new skills and I was very happy with the end product. There was the strap, though, which if I really had thought about it, I would've liked to topstitch that with white like the shoes, now it looks a bit home made. Also, I noticed after letting them set a bit, that one of the sides wasn't pulled as tight as it could and it's a bit wonky. But I would say these are minor details. All in all, the shoes are great and the little things don't really show if you don't look too closely.
The shoes had to wait a week before you could try them on, so that there was time for the glue to really set in. I finally tried them on and they fit like they were made for me. Oh wait, they were. Here are few pictures with me wearing them. Sorry about the mirror pictures, I'm staying at a B&B and needed to make do.

If you are interested in shoe making. Or more likely if you already know how to make shoes you might be interested in J. T. Bachelor and S&K Leathergoods & Fittings that sell leather and shoe making supplies in London (these are here to remind me as well...). If anyone knows other good places for supplies (especially in France!), please let me know in the comments!

Sunday, March 23, 2014

Hello, my name is Anna and I'm an addict... (aka Craftaholics Anonymous)

Well, I will blog about last weekends thing later (there are still some pictures to be taken), but yesterday I actually went to a craft fair in Birmingham. This was a bit of a surprise event for me, as I actually didn't know about it before Sheila from the B&B told that she's going. So, I tagged along...

It was held by ICHF Events
@NEC Birmingham and with the same ticket you could enter all three parts:
1) Fashion, Embroidery, and Stitch
2) Sewing for Pleasure
3) Hobbycrafts

I had looked at the website before and the main things for me to see where a workshop by Bernina (Bernina in Finnish) & Madeira. There were actually three options for me, but I got my first choice, the stitch covered mini notebook, which was perfect timing-wise. The main idea was to try free motion embroidering with a machine, so that's why I had some choice. That started only at 11:45, so I had time to go an listen to Stuart Hillard's 10:30 talk on wardrobe customization, which was the other main event for me.

While I was waiting for the talk, I looked around a bit and just next to the talk podium, they had The Giant textile books. So, amazing! See the pictures below for two of the books and visit their website to see more pictures and past exhibitions.


So, then it was time for Stuart's talk. If you've never heard of him, shame on you. Well, not really, but he was a contestant in the first series of The Great British Sewing Bee. He gave really good tips on what you can do with just few simple things. I'm a lot better at doing something from scratch than customizing, so I was excited about this and he didn't let me down. And I even got a picture with him! And just look at his pants, I love the color!
Stuart demonstrating what you can do
with a t-shirt and a tie
Me and Stuart. I have the worst posture ever in
this one and it makes me look kind of fat...
well, at least Stuart looks good :)


I had a bit of time before my machine embroidery workshop, so again, I was just looking around. And I saw this guy making all kinds of cords with an interesting method. And of course I decided I need to learn it and I got the kit. There was a beginner's kit, but the one I got included the beginner's kit + more advanced stuff. I think I'll be ok with it :) The method is called lucet and you can find more about it at Ziggy's website.


So, then finally it was time for the workshop. It was taught by Pauline Verrinder from FibreFusion. And in one hour, she managed to help us learn free machine embroidery (no embroidery machine needed!) and we made a small note book as well. First it was a bit of practicing, I tried to do a flower (that looks better than I would've expected for my first try and then I tried writing my name, which was a less successful attempt. But I think my final product looks pretty good. You can see here the actual notebook (the cover keeps opening, so I needed to weigh it down with my camera case) and a zoom in to one (the better one) of the flowers.


After this workshop and lunch I went to see if I could get to an appliqué workshop in Sizzix stand. It was a workshop without reservations and the next one was starting in half an hour, so I decided to sit down and wait. I actually got very tempted to buy the cutting machine they advertised (which I guess was the point of it all), but I think with the amount of quilting and appliqué I'm doing at the moment, I can be without one... The workshop was held by Angela Southey, who also writes on the Sizzix blog. I got so much out of it and I think my needle case turned out ok (and I didn't have one!)

I also met a really cool person who I shared the machines and iron with. Jenny has her own company and she buys bags which she then embellishes and sells further. Take a look at her work on her website.
Needle case with a butterfly appliqué
After all of these workshops it was 14:30 already. But this was kind of perfect. The place didn't have a lot of places to sit down, so people started to get tired around this point. I had sit most of the time until then, so I was totally ok for walking. So I missed the worst rush. I had managed to buy a few things in between the workshops, but now I started to have a hard time controlling my shopping impulses. I think I used more money than I had planned, but everything I got was useful (well, I really shouldn't get more fabric...) and things I haven't really seen in Paris. Or I'm sure some of the stuff you can get there, but I would have to go look for it.

So, at this point my shopping included, in addition to the lucet stuff: a meter of tweed remnant (£5) and some general stuff for sewing like glue pens, rotary blade sharpener, some cable needles for knitting, and a scissors case. I still needed an embroidery hoop for machine embroidery, which wasn't too hard to find.
Linton tweed: 100 cm x 140 cm / £5


I also saw some good deals on patterns, but luckily most of the ones I was interested in didn't have my size anymore, so I ended up getting only two. The underwear one is mostly for the corset as I think I can make a petticoat without an actual pattern. And I was very happy to find one of the retro patterns I've been drooling on in sale.


I also found some plain red cotton fabric, which is perfect for my vintage dress, that I'm still planning on to do. I have some linen in the same color, but I've been a bit worried that it might be a tad thick with the polyester.

And then I saw this really cute tractor fabric at Doughty's and I really need to sew a shirt for my nephew. He just loves tractors: my mom got him a t-shirt with a tractor on it for Christmas and he only took it off when my sister told him that if he doesn't give it to her to wash now, he won't have it for the whole next week... So, just to have a dressier shirt, right? And when I was in line to buy that I saw the girls in front of me getting the cool camera fabric below and I just had to be a copycat and get some. The color isn't really my color, but at least there are some yellow cameras... And maybe I can combine it with something... :)


After I got some food, I had a bit more energy left and I saw the cutest cat fabric ever! It was in thre Little Laura's Haberdashery and they had the same one in white as well and while I was pondering out loud to the lady next to me that I would get it as a contrast, she pointed out to me that there was actually even a better contrast fabric on the shelf. The black one with paw prints on it. How perfect is that. I'm thinking of Alma & Chardon (with a contrast edge), or maybe something like Ava or Macaron...

And then something draw me back to the tweed and Linton. Maybe the fact that I got into my head an idea of a tweed jacket and my 1 m piece wasn't big enough for that (for the 1 m piece I'm actually planning Thurlow). So, I went back and looked at the 2 m pieces that were meant for jackets. And I saw it right away. It was actually one of the most expensive ones at £60. I really loved it, though, and while I was wondering if I should get it the lady asks me if I'm a student. I said I was, although an astrophysics student, and she told me that the student price was £45. She kind of sounded like I should've actually been a dressmaker student or something, but I guess she felt sorry for me: I'm sure she saw how much I liked it... And the best thing: this was actually a fabric ordered by Chanel, but when the fabric is older than 3 years they can start selling it as a fabric as well. So, I need to make a Chanel jacket, right? And what is a better pattern than V8804? So, I think I need to go pattern shopping...
Vogue 8804