Showing posts with label retro style. Show all posts

Sunday, September 15, 2013

Bombshell swimsuit --- or I'm always out of season

The Stitchy Details:
Bombshell Swimsuit
  • Challenge Theme: Originally: Swimalong 2013, tried: Défi vintage - Thread and Needles: Plage (Août 2013), but missed both deadlines...
  • Pattern used: Bombshell swimsuit
  • Fabric: Turquoise lycra with red dots and swimsuit lining from Spandex House (love the selection, but the postage was huge!) 
  • Notions: Swimsuit elastic, cups (swim proofed)
  • Did you make any pattern alterations or design changes? I made the size 10 of the view A of the pattern and added some seam allowances to waist and hips, since my measurements were slightly bigger on those parts.
  • First worn/Wear again? For the pictures. It's not really swimsuit weather in Paris anymore... Maybe in Qatar in November if there's a place to swim.
  • Total price: ~75 €, most of this came from the fabric, because the shipping costs were almost the same as the price of the fabric. And also I ended up buying 2 patterns for this...
  • Time to complete: 16h

---------------------------------------------------------------------------------------------------------------
Taping the pattern...
So, remember when I wanted to make a swimsuit in June? Well, I didn't abandon the plan, but I needed to pluck some courage to actually make it. And also, I tried way too many challenges at the same time. I thought I had time, but then, I have other things in my life too. Like work. That really cuts on my sewing time... Anyway, I have finally joined the wonderful group of sewing ladies who have pictures of their butt in the internet. The things sewing makes you do...

I actually had another pattern at first, as you might remember, but when the bombshell suit came along and there was no need for zipper like in the other pattern, I decided to go for it instead. Also, seeing so many awesome examples around, I just couldn't help. But, I didn't make the deadline. I mean, that was end of June and now it's September... I thought I would make it to the Thread and Needles vintage challenge for August with a theme: beach, but hey, I missed that deadline too... But, I finished the suit and finally I have a new swimsuit! That covers my butt and my stomach! I haven't seen bad versions of this swimsuit or unflattering ones either. I think this is one of those garments that look great on everybody!

I was a bit nervous, since I haven't really sewn anything stretchy before. Well I have, but I've always had a serger and now I just have my sewing machine, since the serger is my mother's and lives with her and of course at school I used the school's serger. But the pattern said, you only need a sewing machine and I have been watching a craftsy course about sewing knits without a serger, so I was sure it's doable.

Cutting, first time using weights :)
Well, I had some problems with cutting. I think my mistake was trying to use the rotary cutter. I think the idea of the rotary cutter is a good one, but mine is kind of dull at the moment, so it didn't give me a clean cut. Also, with back I forgot to grade the pattern to my waist and hips, so I had to cut that again... Luckily I have more than enough of fabric. Even with my screw-ups I think I have enough for another swimsuit. Well for a bikini anyways.

I decided to do this one right, although I wasn't really into making a muslin (and I haven't really read anyone making alterations), so that part I skipped. But I decided to hand baste my ruched pieces together since gathering and machine stitching with pins doesn't really sound like something that would work well if I do it... (also I was in the middle of a 2-part episode of Star Trek, TOS, so this way I could keep watching...).

Still a big mess...
I lost my faith so many times doing this... Mostly because I haven't sewn anything with a stretchy fabric before and I was so afraid that everything would turn out horribly wrong. I had some trouble with my added seam allowances. I didn't realize that I put them in the center seam in the back (yes, as it is pointed out in the instructions: the curved seam is the center back!!!). So I had to adjust the leg openings a little. I sometimes found the instructions a bit confusing, but then in the end I was just following the sew-along posts. And those instructions rock!

Bombshell SwimsuitThe hardest part however was the top part. It took forever for me to get those cups in place and I still think I sewed them on too low. Also, I'm wondering if I should've taken the smaller size I was debating about while I bought these. But I think the biggest problem is the shape. Although I'm not against the whole bullet style in general, it is the style favored in the 50s, but these are really hard, while the 50s style would come because the didn't have underwires and the bra's were made of fabric without any shaping material. Also, I distorted the top while I sew the elastic on and it's too big and the elastic is not holding anything. I did fix it a bit with the straps, so I think it looks ok in the pictures, but I'm not really happy with the top part.

Bombshell Swimsuit
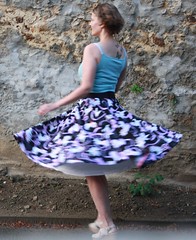
All in all, I'm not over the moon about it, but as for it being my first swimsuit it's ok. The pattern is amazing, although I think I didn't need the extra I added for the seams (or I could've stretched the elastic a bit more), I could've gone for a bit more tighter fit, which is what I like when it comes to swimsuits. The style is very flattering, but I think next time I try to find cups that are less pointy and more comfortable. Lauren used a trifted bikini and ripped the cups off that, which might be a solution. But I think for my first swimsuit this is very presentable. And I was a bit worried about taking photos, you know, in my swimsuit, in the backyard parking lot 7:30 pm, when it's 15 degrees outside... The lighting could've been a bit better, but yes, my legs really are quite white. But no one walked by and it wasn't as cold as I thought. And I got my pictures from the first set of 10, so that helps. And see: I'm wearing heels...! I think they were the only suitable footwear with this suit :)

Wednesday, August 28, 2013

Sewing Dare no. 1:
My Jazzy Aristocats Circle Skirt

Jazzy circle skirt
My happy picture: too bad you can't see the
 whole skirt and my shoes that I wore just
for the pictures...
The Stitchy Details:
  • Challenge Theme: #sewingdares
  • Pattern used: Self drafted 
  • Fabric: My pretty Aristocats cotton, bought from Etsy and no longer available
  • Notions: Zipper and 2 snap fasteners
  • Did you make any pattern alterations or design changes? No changes, since there was no pattern...
  • First worn/Wear again? Worn today to work. Will wear again for sure. Probably even dancing on the weekend, if I don't feel that the petticoat waist is too bulky.
  • Total price: ~49 €
  • Time to complete: 14h 15min

---------------------------------------------------------------------------------------------------------------
Jazzy circle skirt
Front view without
a petticoat
I decided to go for the Monthly Stitch format for all my finished project entries, although I added the time to make, which is pretty accurate, but I always round up to closest 15 min. I'm a bit anal of doing things in a consistent way... Maybe it's the scientist in me, or the accountant. Who knows. In any case, I thought it was a good one, so I'm stealing it for my blog.

So, I didn't have a pattern this time. I almost said it's my first time without a pattern, but that's not true. I've done self drafting before (from old clothes), like the top here. And I did sew a skirt in high school with the same method and that actually turned out quite well. But I've never done it on my own before. So, without my mother's help, that is. But I'm really getting more confident with my skills. I have a great machine that I pretty much know how to use (I used to have my grandma's old, which brought me to tears every time), and then there's the internet. And I know where my weaknesses lie (read: fitting).

So, I had made all these calculations as I wanted to make as long circle skirt as possible to have the more authentic vintage look. Well, I know Aristocats don't really fit into that as the film was made in the 70s (1970 to be exact: I just had to google...) but in any case. And hey: they liked jazz, I like jazz, I'm making a skirt for dancing to jazz... But I'm going on a tangent here. So, I actually calculated how long it should be and stuff and when I started actually making the skirt I realized that I did these calculations for nothing. Nothing wrong with the calculations themselves, but I didn't think that I have one way design on the fabric, which means I have to cut the both sides the same way and I can't use the sideways cutting...

Pockets - what a happy idea!
But after that it was pretty much a breeze. I wanted to have pockets, like I always do, but I just used the same pattern piece I drafted for my Réglisse. I even used the same fabric as in Réglisse, the one that was left over from Pastille that never came to be... I also am not a fan of an elastic waist. So, that meant a zipper and a waistband (waistband being the reason it has taken so long for me to get to this: I wanted solid black fabric for it). I found great help for this as I was wondering how to put the zipper in as I didn't want to add a pocket AND a zipper to the same seam. But Casey over at Elegant Musings has a series of circle skirt tutorials (it was a sew-along). I used her method to add a slashed zipper and also the instructions on the waistband. Well I did make some mistakes in the waistband originally, so I ended up cutting a new one. Luckily I had a bunch of the black fabric: it was super wide, from the home decoration side of the fabric shop and you had to buy at least 50cm. Well, there's a lot of it...

The hem finish
Only thing that really took time was hand stitching the hem. But I think it was worth it. I was a bit annoyed how that turned out on my Réglisse and I really wanted this to look good and not go wonky. And I think I achieved that, you can judge from the picture. I also used the bias I had left from Réglisse, so I could have a longer hem. I don't know about the hem calculations, but this ended up being almost as long as I originally wanted (maybe it's my waistband that lowers the hem). But I would've been finished a day earlier if I had stitched it with the machine (it took me like 4h to do the whole hem...). But as I said, in the end, I think it's worth it. And when it was all finished, I realized I had a problem with the waistband, so I changed it back to the original that I had already discarded and actually that one worked really well :) I actually wanted to put in a skirt hook instead of the snaps for fasteners, but I realized that the ones they sold me were for pants and they were huge. So, not really great for my kind of flimsy waistband. And the other hooks I have were too small. But luckily I have a lot of snaps... I always buy them thinking I don't have any, but I have a lot, even some black ones.

So, my pictures today didn't turn out so great, but at least you can see the skirt. In the side view pictures you can really see the difference when wearing a petticoat or not. I have one with a bit of tulle, my mom made it for me for a 50s skirt when I was in high school. It's a cheap version, but actually quite accurate for what was worn at the time (my mom still remembers).
Jazzy circle skirt
Side view without a petticoat
Jazzy circle skirt
Side view with a petticoat
Thanks Clare for challenging me to do this! And of course Gillian to arrange everything in the first place! It was fun and I'm really happy about my new skirt! Here's some compulsory swirly pictures where it's really advantageous to have a petticoat!

Jazzy circle skirtJazzy circle skirt
Jazzy circle skirt

And on the giveaway news: I never reached the Colette Sewing Book winner, so I chose a new winner:
I will mail all the prizes this week. I hope you enjoy them!

Wednesday, May 22, 2013

The Sassy Librarian


So, since I'm still waiting for my lining fabric and the swimsuit fabric is currently held by Fedex (they have tried to deliver it, but since I couldn't get to the phone, they leave messages that even my French friends don't understand... they should deliver the package tomorrow), I decided to start yet another project...

Well, it started from the fact that last weekend there was a lot of Craftsy courses on sale. And I sort of splurged (been doing that a lot recently...). So, what did I get? The first one I decided to buy was Sewing with Silks with Linda Lee, since the last twitter #FabricChat was about silk and got me excited, but I know nothing about sewing silk, except that it's hard. And with that there was an offer for Pattern Drafting from Ready to Wear with  Steffani Lincecum. So, I guess I was exactly their target group. And well, since I'm on the Pants Club, I got the Pant Fitting Techniques with Sandra Betzina and also with Sandra, the Pants Construction Techniques. And finally, the one I've been craving for (mostly because the pattern is exclusive for the course:
The Sassy Librarian Blouse with Christine Hayes
Well, I was very excited about the Sassy Librarian Blouse and actually started watching right away. It was less about fitting and things I need to learn about and just basically instructions on how to construct the blouse and it's different variations. Now, I've taken sewing in school, but mostly we just got instructions verbally, although it was sometimes hard: my teacher had her favorites and I wasn't really one of them (I don't think she hated me or anything, she just thought I was odd - which might be true). So my projects sometimes worked and sometimes not. It didn't make me very excited about sewing clothes, I always had problems with the fit. In junior high, I had a better teacher, but the class was really big, so you always had to wait, but my project turned out a lot better.

So, the point (yes, I have one!) is that because there's just the teacher and the camera, you see really well what's she's doing and everything is explained very clearly. To my surprise I had learned something in school and lot of the hints were things I've been doing (yey!). But I did learn new things. And I've been lately addicted to pleats, and this has them in view 2! And OMG! How cute are the fabrics Christine is using! I need to get like all of them! Well, maybe not grey, I'm not a big fan of grey (and it looks quite horrible on me).

So, there's two views you can choose from. The view 1 has sleeves, a collar and straight front, and the view 2 has pleats, a bow, and it's sleeveless. Well, you can combine the elements any way you want. Here are some amazing examples of finished blouses (find a link to the original under the picture):
Clare Szabo
Alix B
scuffsan
jmacal9425
And there are many more...

My plan is to make a sleeveless blouse with pleats and a collar. Although I will use a peter pan collar and since I've never drafted anything and will only get an uneven result, I got a pattern for the Rosemary Collar by Christine Hayes. I will use my other set of old Marimekko curtains:
Muija by Maija Isola 1968, Marimekko
Green Muija
These are popular prints from the 70s, like Kaivo that I used in my Miette Skirt. These are Finnish design classics and remind me very much of my childhood. Muija is only available in black and white at the moment (although I did still see colors somewhere, but not on the official Marimekko site), but when I bought this there was also a lovely green version available (see the picture on the right). After thinking long and hard I chose the orange in the end. I also have some plain yellow fabric that I'm using for the bias binding and collar. We'll see how it looks like when it's done. I'm quite proud that I'm not buying any fabric for this. Only thing I needed to get was buttons. If I don't screw this up, I think I'll be using this top a lot.

I think the course is good for a home sewer, even if you're not very experienced. It assumes you know some basics, but things like buttonholes are explained, so you don't need a whole lot of experience. I also loved the idea of not knotting your thread, but securing it while sewing. I like the approach that even though you want to be accurate and get a finished look, if you screw something up, but it doesn't show, don't worry about it too much. And also that you don't have to have special tools for everything. I've also enrolled in some classes that uses couture techniques and I'm sure it's easier to get that look with proper tools, I just can't get everything. Things cost money, and I don't even have a good place to cut at the moment (I used to do it on the floor, well still do, but I have a tile floor, so it's a bit inconvenient), but I still manage to get things done. Ideally I would have a sewing room, but I don't see that a likely development in the near future. At the moment I live in a studio. Well, my mom managed to sew in the corner of the bedroom... well, I guess I'm doing that too. But most of the tools introduced in the course I already have!

In addition to this class, I've started few other classes at Craftsy and I have to say, I really like the format. You can look at the videos on your own time, you can make notes to them, when there's something in the middle of the video you want to get back to and you can ask questions and the teacher and other students are there to answer you. I also learn a lot from the questions of others. And then you can see finished projects other people have made, which inspires me a lot. If you haven't heard of Craftsy or never tried it, I really recommend to try one of their free courses like the Mastering Zipper Techniques (haven't taken it yet, but heard good things about it here). Well, I'm hooked anyway. Now I just have to finish them. And no, I wasn't in any way sponsored by Craftsy.

Hopefully there's some finished garments soon. And hopefully the weather gets better here, since I'm sewing all these summery things... Well, this one should work, since I already got the buttons and I have the fabric and the pattern was a pdf. Then again, I have a lot of work to do and my parents are coming to visit: they'll be here tomorrow. We'll see. I will also keep the blog updated about the other Craftsy courses I'm taking.

Wednesday, May 15, 2013

SwimAlong2013


My sewing challenges are coming along, I did some fitting with my mother while I was in Switzerland. I didn't really have to change anything. Except keep the bodice with extra length for Réglisse. But I had forgot to order lining for my flapper dress (and the zipper!) and I realized that with the fabric I bought for Réglisse, I need to line it too. So, I'm waiting for some extra material now. But hey, I decided to go for another sewalong...

Katie at Kadiddlehopper and Leila at Three Dresses Project are hosting a swimsuit sew-along. I have a hard time finding swimsuits and/or bikinis I like, so I decided to give it a go. Also, it's on till the end of June, so I have time even if I don't start sewing before June... But I got my pattern already! I went for Mrs Depew Vintage's One-Piece Bathing Suit. I was looking at the lovely 40s pattern as well, but this has my size. So, if this goes well, I might try that as well.
I also ordered a fabric:
Fabric from Spandex House
I'm thinking of making the halterneck version. I think I will like the feel of it more. I'm quite excited, although a bit afraid as well, since this will look horrible if it doesn't fit well. I'm also really happy about the pattern, although I really wanted to make this:
Hollywood 1341
But I couldn't find where I could buy it. Or I did (and it was the right size!), but it was $85 + shipping, so I think not... I will keep a look out for this, however, since I'm totally in love with it. But I think I'll be happy with my current pattern as long as I can make it fit...

Saturday, May 4, 2013

It can be Christmas every day!

Well, especially if you're me and forget about what you ordered. So, the Couture Vintage by Tonje Thoresen (in French!) was a nice surprise.
In my letterbox today
Photo by rankkaapina • Instagram

And they all look so wonderful! The Couture Sewing Techniques by Claire B. Shaeffer is a technique book, no patterns there, I've just been drooling for it for a long time. I bought it together with Gertie's New Book for Better Sewing (Check out Gertie's blog also) which actually mentions my old sewing book that I got from my mother (it's from the 80s, but awesome) and you can actually still find it in English (Reader's Digest Complet Guide to Sewing).  The one thing I love about the Finnish version is that the name is "The Great Sewing Book - Sew and Save". Yes, saving has been a big thing in Finnish sewing at least in the 80s. Well, I know my sister also makes a lot of clothes for her girls and saves up a lot.
The best sewing book ever, and better yet: in Finnish!
The Couture Vintage book looks amazing! It's exactly what I want: not sewing technique, just the patterns and the instructions. With craft books I really like when they keep these things separate. I mean I have the Colette Patterns book and Gertie's book which both have technique and patterns, but I have good technique books, so I'd rather just have the patterns and specific pattern information on those books. Well, of course, they are more beginner friendly. But back to my French book, you can see a review and the pictures of all the clothes here (in French, but you can always look at the pictures if you don't know French). I would like to make at least these:


I mean how perfect are these!? Well, it does help, that the model is awfully pretty, but that's the beauty about sewing: you can actually make these fit you, and if they fit, they'll look great.

And something about this book and also the Réglisse pattern that I got today (I'll be off to make a muslin after I write this): the patterns are on a thick paper, so they will be easier to preserve! I think this might be a European thing (I might be wrong), because before Colette patterns I had never seen the thin pattern paper. Of course I will transfer these to such paper, but the originals will be intact! The book uses the same technique as many pattern magazines: you have a bunch of patterns on top of each other to save space. This just makes me so happy! And the Deer and Doe patterns have the instruction booklet both in French and in English (so there's really no excuse not to order these patterns). But if you like vintage style, I really recommend the Couture Vintage book. It's only in French (I think, I didn't really search for it), but I think the pictures are pretty clear and you can always look up techniques on a book in your language. Plus you might learn a bit of French :) And the clothes just look SO pretty!

Tuesday, April 30, 2013

The Great Gatsby Sewing Challenge - May 2013

The ever-so-talented Miss Crayola Creepy is hosting a sewing challenge for May 2013:


As I'm in the need of a flapper dress (I haven't totally given up on fixing this one, but I'm not really looking forward to it: it won't be very flattering in any case), I decided to join. I'm not so excited about the movie, although I do want to see it, but I am excited about this challenge! This will be my first ever sewing challenge... We'll see how it goes. At least I'm very enthusiastic.

I have a problem with 20s style, so it took me awhile to find a pattern. I love the style, but the straight dress just doesn't look that great on me, 50s style is definitely more flattering on my figure. But I have looked at so many historical 20s dresses that I can say, that even though the majority was straight with a low waist that look better on an androgynous figure, there were also more fitted flapper dresses, like these:
Joan Crawford models a flapper dress.
Flapper dress from the 20s (Decades Inc.)
Actress Juliette in Flapper Style Dress Date Photographed: ca. 1920s
So, this was my idea when looking for a pattern. I'm not great at seeing the possibilities of a pattern that has been styled very differently yet (I'm working on it...), but then I found this pattern from Sew-n-Sew:
So, I decided to get it. It wasn't the cheapest one, and I'm sure I could've found something similar with less money, but if I want to finish by the end of May, I need to decide on something. I'm quite slow at sewing and I make a lot of mistakes I need to correct, so I don't want to end up rushing this. And I really want to try to finish on time. But I'm happy with the pattern (at least for now), I just want longer fringe, like in the dress actress Juliette is wearing. This might be a challenge, though. I didn't find fringe I liked when I was doing the first charleston dress, so I hope my luck will change.

Sunday, April 28, 2013

My 70s Miette

So, I've been frustrated with the Pastille dress and realized that I need to do something in between. And actually once I started sewing again, I realized I need to fit the whole bodice again, since I will never wear it, if I just sew it now. Good thing I bought way too much fabric since I bought according to the advice on the book and if I learned something in school about sewing, it was to not waste fabric (it might be one of the deadly sins...).

Anyway, I've been reading the blogs lately and noticed that Tilly has a lovely new skirt pattern: Miette. It was supposed to be very easy without buttonholes or zippers and it was awfully cute, so I thought it was perfect. I haven't yet sewn anything since I moved to France, so I wanted to get back into it with something easy and fun. And this skirt definitely was both easy and fun. Although I'm the world's slowest sewer (why does that word make me thing something else than sewing...), so it took me a long time to do this, but hey, that's me.

So, this was one of those print yourself patterns, so I shamelessly used the printer at work, but at least I could use the black-and-white one... There were a lot of pages, which then needed to be taped together... it actually wasn't that bad, the pages were clearly marked, but since I try always to get everything to match with an 1mm error bar, it was a bit time consuming for me... And then of course I trace everything to a pattern paper. This I was wondering about if it's stupid, but Lucky Lucille convinced that just cutting is the stupid way :) (and I know I can trust her: just look at her sewing!)
Let's start the cut & paste operation
Almost done...


So, when I finally had my pattern, I took my old Marimekko curtains, with the classic "Kaivo" print (Maija Isola, 1964) and started figuring out the cutting plan. It was a bit harder than normal, since I didn't have the real edges any more and the fabric had stretched a bit and also I had to avoid the sunburnt parts of the fabric. I tried (the first time ever!) to actually look how the print would match, but I couldn't be too particular, since, you know, curtains. So, I did the best I could. Also first time ever I used decorative stich on anything. We didn't use to have a lot of those in the old machines at school, and the few there was, were never really used, we learned to sew practical things (yes, I know it wasn't the war time). So that part was done to the edge of the pockets.
Simple decorative stich, my very first :)
I don't know why I took this picture of the waistband construction, but look at my new ironing board I bought from Franprix. It makes me so happy! Who knew I could ever be happy ironing...?
I finally finished the skirt and even wore it to a picnic brunch on the first really warm day of the spring. But of course me being me, I managed to get something (pink?!) on it that doesn't come off. Well, this is not new to me, so let's just cover it up with some decorative crocheting... So I crocheted three little flowers and now you can't see the stain! And I think crocheting really emphasizes the seventies look. 
Crocheted flowers on top of the stain...
Finally here are pictures of the finished skirt (with flowers, I had some without, but they were taken with my iPhone and not very good quality...). The orange shirt wasn't maybe the best option, but it's another Marimekko product, so I didn't bother to change...
The front

The back, this was surprisingly hard to get at least somewhat straight. The picture, I mean, although I think part of it is my crooked back...
Side picture: some surprisingly good pattern matching (I didn't even consider the side seams, just front and back)
Sewing facts:
Fabric: Marimekko, Kaivo (classic Finnish design by Maija Isola, 1964)
Pattern: Miette Skirt
Year: 2013
Notions: none
Time: ~10h (yes, I'm slow, but the time went to preparing the pattern and cutting from the old curtains, the actual sewing was quick and fun!)
First worn: For brunch in Bures-sur-Yvette on 14/4/2013
Wear again: For sure! I'm looking forward to the summer. Even if it is a wrap skirt, it's constructed in a way that you don't need to worry about flashing even when it's windy. And yey: pockets!
Total price: 8,49 € (the pattern, the fabric I count as free, since the cost was for the curtains)

Monday, July 2, 2012

Pink = Summer!


Well, about a year ago I was helping to move my dad's aunt (over 90 years old) to a old people's home. Lot of her things had to go and I got this old nightgown she had done herself. She had also crocheted the lace.

Well I didn't want to use it just at night, since the color was so pretty, and the lace too! So I decided to cut it to a new summer shirt. I'm not sure if I should make it more even, but I think I'll just use it like this with no worries :)


Well, it actually looks better in real life than in the pictures, but today was not a good picture day and I was sick at taking pictures... And I don't know where those charleston hands came from, I swear. Anyway, I think it's a fun summer thing to have. And I know this is not the most flattering style for me, but I think I'll wear it anyway :)